
GENERAL
What Size Is a Nose Piercing?

What Size Is a Nose Piercing? A Comprehensive Guide
Nose piercings are a popular form of self-expression and body art, with many people choosing to adorn their nostrils with jewelry. However, before you get a nose piercing, it’s essential to understand the correct size for your piercing. Choosing the right size jewelry is crucial for both comfort and healing. This guide will explore the different sizes of nose piercings, the common jewelry types, and how to select the best option for your individual needs.
Understanding Nose Piercing Sizes
When it comes to nose piercings, the size typically refers to the gauge and length of the jewelry. The gauge is the thickness of the piercing, while the length refers to the size of the jewelry itself. These measurements are vital because they influence the comfort, fit, and healing process of the piercing.
1. Gauge Size: What Is It?
The gauge refers to the thickness of the needle used for piercing and the jewelry itself. It is measured in numbers, with a higher number representing a thinner piercing. For instance, a 20-gauge needle or jewelry is thinner than an 18-gauge.
- 18 Gauge: This is a slightly thicker piercing, measuring 1.0mm in diameter.
- 20 Gauge: The most common size for nose piercings, measuring 0.8mm in diameter.
- 22 Gauge: A thinner option, measuring 0.6mm in diameter. It is less common for initial piercings but can be used for more delicate jewelry or healing.
2. Standard Size for Nose Piercings
The 20-gauge size is the most commonly used for nostril piercings, as it provides a balance between comfort, appearance, and healing time. A 20-gauge piercing is suitable for most individuals, and it accommodates the jewelry typically worn in a nostril piercing, such as nose studs, nose hoops, or L-shaped nose rings.
For those with smaller nostrils or thinner skin, a 22-gauge piercing may be used, though this is less common and may require a professional piercer’s expertise. If you are getting a nose piercing for the first time, it’s always best to consult with your piercer to determine the most appropriate size based on your anatomy.
Types of Jewelry for Nose Piercings
Nose piercings can be adorned with various types of jewelry, each with different size requirements. Below, we explore the most popular jewelry styles and how they relate to piercing sizes.
1. Nose Studs
Nose studs are one of the most popular choices for nostril piercings. They come in a variety of shapes and designs, such as:
- Prong-set stones: Featuring a gemstone, such as a diamond or cubic zirconia.
- Flat or screw-shaped ends: Providing a secure fit inside the nostril.
Most nose studs come in a 20-gauge size, though you can find 18-gauge studs for thicker piercings. It’s important to choose a stud that fits well in your nostril to avoid discomfort or irritation.
2. Nose Rings
Nose rings are a classic choice for nose piercings, and they come in various designs, such as:
- Hoops: A simple circular ring that fits around the nostril.
- Septum rings: Specifically designed for septum piercings, but some people use them in nostril piercings for a different aesthetic.
Nose rings are typically available in 20-gauge and 18-gauge, although you may find 22-gauge options as well. Ensure that the size of the ring matches the gauge of your piercing to prevent discomfort or difficulty in insertion.
3. L-Shaped Nose Rings
An L-shaped nose ring is a popular style that features a straight bar with a 90-degree bend, making it easy to insert and secure in the nostril. The shape of the jewelry keeps it from falling out easily, offering a snug fit. These rings are usually available in 20-gauge or 18-gauge sizes.
4. Screw-In Nose Jewelry
Screw-in nose jewelry features a screw-like end that twists into place, providing a secure fit. These types of nose rings are common for people who have had their piercings for a while and are looking for a more permanent, stable piece of jewelry. They are usually made in 20-gauge or 18-gauge sizes.
How to Choose the Right Size for Your Nose Piercing
Choosing the correct size for your nose piercing is essential for comfort, healing, and overall appearance. Here are some key factors to consider when selecting the right jewelry size:
1. Consider Your Anatomy
Before deciding on the gauge and jewelry size, it’s important to consider the anatomy of your nostrils. People with smaller nostrils or thinner skin may find that a 22-gauge piercing works better for them, while those with larger nostrils may prefer a 20-gauge or 18-gauge piercing.
Your piercer will typically assess your nose size before performing the piercing to determine the best gauge for your anatomy. However, if you’re unsure or have specific preferences, don’t hesitate to ask the piercer for recommendations.
2. Gauge and Jewelry Size Compatibility
Ensure that the gauge of your jewelry matches the gauge of your piercing. A jewelry piece that’s too thick for your piercing can cause pain or irritation, while a piece that’s too thin may not fit securely and could risk falling out. Most nostril piercings use 20-gauge jewelry, but always check with your piercer if you’re unsure about your piercing’s gauge.
3. Healing Considerations
During the healing process, it’s generally recommended to avoid changing your jewelry too soon. Some people may have sensitivity to certain metals or jewelry styles, so consider selecting hypoallergenic materials such as surgical steel, titanium, or 14k gold. These materials reduce the risk of irritation and help promote faster healing.
4. Jewelry Style and Personal Preference
Nose piercing jewelry comes in a variety of styles, so selecting the right jewelry for your personality and lifestyle is important. Some people prefer the simplicity of a nose stud, while others like the boldness of a nose ring or hoop. It’s best to choose a style that complements your personal taste, while also considering the gauge that works best for your piercing.
5. Pain and Healing Time
Choosing the correct size jewelry can help minimize pain during the piercing process and reduce the risk of complications during the healing phase. Larger gauges, such as 18-gauge, may cause a more noticeable amount of discomfort initially, while smaller gauges, such as 22-gauge, are less invasive and may take less time to heal. However, 20-gauge remains the most common and balanced choice for nostril piercings, providing a good compromise between comfort and aesthetics.
Aftercare for Your Nose Piercing
Proper aftercare is crucial for healing a nose piercing. Regardless of the size or style of jewelry you choose, you must follow aftercare instructions to ensure a successful healing process. Here are some tips for caring for your nose piercing:
1. Clean Your Piercing Regularly
Use a saline solution or an antiseptic solution specifically designed for piercings to clean the area daily. Avoid using harsh chemicals, such as hydrogen peroxide or alcohol, as they can dry out the piercing and delay healing.
2. Avoid Touching the Piercing
Refrain from touching or twisting the piercing, as this can introduce bacteria and increase the risk of infection. Always wash your hands thoroughly before cleaning or changing the jewelry.
3. Avoid Sleeping on the Piercing
Sleeping on the side of your piercing can irritate the wound and delay healing. Try to sleep on your back during the healing process, or use a special pillow designed for piercings to minimize contact with the area.
4. Monitor for Infection
Keep an eye on the piercing for signs of infection, including increased redness, swelling, pain, or discharge. If you experience these symptoms, seek advice from your piercer or healthcare provider.
Conclusion
Choosing the right size for your nose piercing is essential to ensure comfort, proper healing, and the perfect aesthetic. The 20-gauge size is the most common for nostril piercings, but it’s crucial to consider factors such as your anatomy, the jewelry type, and your healing process before making a decision.
With the right size and appropriate aftercare, your nose piercing can be a beautiful and lasting form of self-expression. Always consult with a professional piercer for personalized advice and tips, and don’t hesitate to ask questions to ensure that you’re making the best choice for your body.
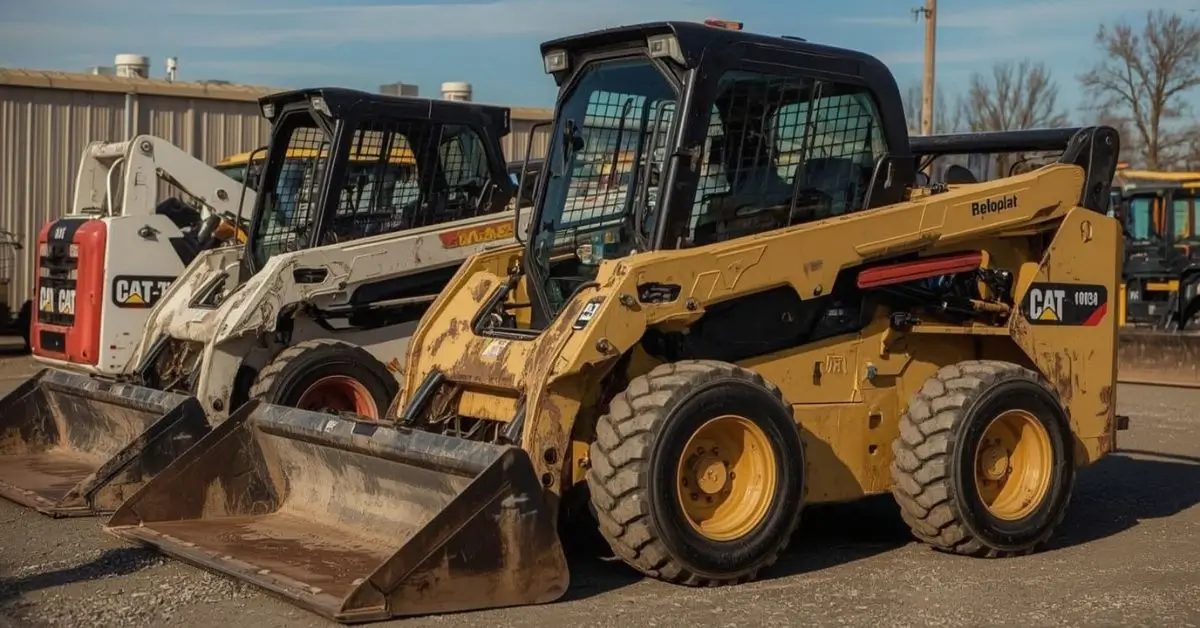
The biggest reason operators choose the best used skidsteers is simple: price. A brand-new model can cost between $40,000 and $70,000. Meanwhile, a quality second-hand machine with fewer than 2,000 operating hours can be half that cost, yet still deliver years of service.
Faster ROI
Contractors often highlight that investing in affordable skid steer loaders means hitting profitability sooner. Since skid steers are used across construction, landscaping, agriculture, and snow removal, they can generate returns quickly.
Sustainability Factor
In today’s eco-conscious market, buying used equipment also aligns with sustainability goals. Extending the lifespan of compact construction equipment reduces manufacturing demand and waste.
What to Look For in the Best Used Skidsteers
Engine Hours and Condition
Unlike cars, skid steers are valued more by engine hours than miles. Ideally, you want under 3,000 hours for a reliable machine. Always ask for service records before purchasing.
Attachments and Versatility
Don’t just focus on the base machine—skid steer attachments used can add enormous value. From augers to snowblowers, attachments turn your skid steer into a multi-purpose tool.
Maintenance History
A machine with documented oil changes, hydraulic checks, and regular inspections is far more reliable than one with a shiny coat of paint but no paperwork.
Comparing the Big Names: Caterpillar, Bobcat, and John Deere
Caterpillar Used Skid Steer
Caterpillar (Cat) is known for durability and strong resale value. Buying a Caterpillar used skid steer means access to one of the best dealer networks for service and parts.
Bobcat Skid Steer Deals
Bobcat practically invented the skid steer. If you’re scanning for Bobcat skid steer deals, you’ll find plenty of compact models favored by landscapers. They’re easy to maintain and often come with widely available attachments.
John Deere Skid Steer Loaders
For those loyal to green and yellow, John Deere skid steer loaders deliver strong lifting power and are favored in agricultural settings. They also hold value well in the heavy machinery resale value market.
Real-Life Example
A landscaping business owner shared online:
“I bought a 2018 Bobcat S570 with 1,800 hours for $24K. It’s been a workhorse—grading, hauling, and snow removal. I saved nearly $20K compared to new, and it’s paid itself off in under two years.”
This is a classic case of how the best used skidsteers can transform ROI for small business owners.
Pros and Cons of Buying Used
Pros
- Lower upfront cost
- Faster ROI
- Wide availability of second-hand skid steer reviews online
- Access to attachments at discounted rates
Cons
- Higher risk of hidden wear and tear
- Shorter lifespan compared to new
- May require immediate maintenance
- Limited or no warranty
Where to Find the Best Used Skidsteers
Dealerships – Certified pre-owned with service records
Auction Sites – Competitive pricing, but higher risk
Equipment Rental Companies – Well-maintained fleets often sold after a few years
Peer-to-Peer Platforms – Direct from owners, but requires careful inspection
Financing Used Skid Steers in 2025
One of the top questions buyers ask is about financing used skid steers. The good news? Many lenders now finance used equipment up to 10 years old. Look for flexible repayment plans, especially if you’re a small business owner balancing seasonal income.
Maximizing Heavy Machinery Resale Value
If you plan to resell your machine later, focus on brands with strong reputations. Keeping records of repairs and updates, and investing in popular skid steer attachments used, can significantly boost resale value.
Second-Hand Skid Steer Reviews: What Buyers Say
Online reviews are a goldmine. Most users agree:
Caterpillar holds value best.
Bobcat is easiest to service.
John Deere excels in farming applications.
Skid Steer Attachments: The Hidden Value
From pallet forks to brush cutters, attachments can double or triple the functionality of your machine. Buying them used can save thousands, especially if bundled with the loader.
FAQs
How many hours is too many for a used skid steer?
Anything beyond 4,000 hours typically requires careful inspection. Always compare second-hand skid steer reviews before committing.
What’s the difference between a Bobcat and Caterpillar skid steer?
Bobcat leads in compact models and affordable skid steer loaders, while Caterpillar focuses on durability and heavy machinery resale value.
Can I get financing for a used skid steer?
Yes! Many banks and online lenders now offer financing used skid steers, especially for small businesses with stable cash flow.
Are used skid steer attachments worth buying?
Absolutely. Quality skid steer attachments used can last for years and drastically expand your equipment’s functionality.
Conclusion
Finding the best used skidsteers in 2025 doesn’t have to feel overwhelming. With a clear understanding of brand differences, proper inspection checklists, and knowledge of financing options, you can make a smart, budget-friendly investment.

Finding the best trash Houston services can feel overwhelming in 2025. With so many providers offering different prices, pickup schedules, and eco-friendly options, how do you know which one fits your needs? Whether you’re a homeowner with weekly garbage, a renter managing bulky furniture, or a business needing dependable waste solutions, having the right trash service is essential.
This guide breaks down everything you need to know: from Houston junk removal and trash pickup services to eco-conscious recycling programs, pricing, and real customer insights. By the end, you’ll know exactly how to choose the best provider for your lifestyle and budget.
Why Choosing the Best Trash Service in Houston Matters
Living in Houston means dealing with city-sized trash challenges. With over 2.3 million residents, waste piles up quickly. If your trash doesn’t get picked up on time, you’re left with overflowing bins, unpleasant odors, and even potential pest problems.
On the other hand, the right provider keeps your home or business clean, saves you money, and—if you care about the environment—offers sustainable disposal methods. So the real question isn’t just about trash pickup; it’s about convenience, reliability, and community health.
Houston Junk Removal: Quick and Efficient Solutions
Sometimes, your weekly trash bin just won’t cut it. Maybe you’re remodeling your kitchen or finally getting rid of that old sectional sofa. That’s where Houston junk removal services step in.
These companies specialize in hauling away bulky items like furniture, appliances, yard debris, and even construction waste. Most offer same-day or next-day service, making them a lifesaver during moves or renovations.
Example: One Houston resident shared online, “I had a garage full of old furniture. The junk removal crew showed up within two hours and cleared everything in under 30 minutes. Worth every penny.”
Houston Trash Pickup Services: Staying on Schedule
The backbone of waste management in the city is Houston trash pickup services. Residential neighborhoods rely on scheduled pickups, usually once or twice a week, depending on the service plan.
Private companies often provide additional flexibility compared to city services, such as evening pickups, weekend schedules, or customized routes for HOAs. For busy households, that flexibility can be a game-changer.
Best Garbage Collection Houston: Who Stands Out in 2025?
When it comes to the best garbage collection Houston has to offer, competition is fierce. Providers now differentiate themselves through reliability, digital convenience (mobile apps for scheduling pickups), and sustainable practices.
Here’s a quick comparison table of top-rated options:
| Company | Services Offered | Average Cost (per month) | Eco-Friendly Options | Customer Rating (2025) |
|---|---|---|---|---|
| Waste Management Houston | Weekly trash, recycling, bulk pickup | $35–$50 | Yes | 4.5/5 |
| Texas Pride Disposal | Residential & commercial trash | $25–$40 | Limited | 4.3/5 |
| Junk King Houston | Junk removal, bulky items | $75–$200 (per job) | Yes | 4.7/5 |
| Republic Services | Trash, recycling, bulk, commercial | $30–$45 | Yes | 4.4/5 |
| Local EcoHaul | Junk removal, composting | $60–$150 (per job) | 100% | 4.8/5 |
Affordable Trash Removal Houston: Balancing Cost and Quality
Price matters. Many households in Houston want affordable trash removal Houston services without sacrificing reliability.
The good news? Plenty of local providers compete by offering competitive monthly rates, bundled recycling, or pay-as-you-go junk hauling. But beware: the cheapest option isn’t always the best. Delayed pickups or hidden fees can make budget choices more expensive in the long run.
Houston Waste Management Companies: Who to Trust
Choosing among Houston waste management companies comes down to reputation and customer service. The biggest names like Waste Management and Republic Services dominate the market, but smaller local firms often provide more personalized care.
In 2025, many companies have apps for tracking pickup schedules, digital invoices, and even live customer chat support—features that customers appreciate more than ever.
Trash Hauling Services Houston: Beyond Weekly Pickup
Not everything fits neatly into a trash bin. Trash hauling services Houston providers handle large-scale waste: construction debris, estate cleanouts, and event cleanups.
For example, if you’re a contractor renovating homes, you’ll likely need roll-off dumpsters or frequent hauling services. These providers tailor solutions for businesses and large households that generate more waste than average.
Bulk Trash Pickup Houston: Handling the Big Stuff
City services typically offer bulk trash pickup Houston on specific days each month. This covers items like mattresses, appliances, and yard waste.
But if you miss the city’s schedule, private companies can fill the gap. Many residents book same-day pickups for old furniture or appliances to avoid clutter piling up.
Eco-Friendly Junk Removal Houston: Going Green in 2025
Environmental awareness is growing, and eco-friendly junk removal Houston services are thriving. Instead of sending everything to landfills, these companies recycle, donate, or compost as much as possible.
Some even partner with local charities to give usable furniture or electronics a second life—great for both sustainability and community support.
Houston Recycling and Trash Services: Double Duty
Most households now look for combined Houston recycling and trash services. Bundling these services saves time, money, and stress.
Many companies now offer smart recycling bins that track your usage and reward you with points or discounts for consistent recycling efforts. It’s a win-win for customers and the environment.
Residential Trash Pickup Houston: Neighborhood Essentials
For families, residential trash pickup Houston is the most critical service. Reliable weekly collection keeps communities clean, prevents pests, and ensures compliance with city ordinances.
Private providers may offer customizable bin sizes, flexible schedules, and bundled recycling to fit different household needs.
Pros and Cons of Trash Services in Houston
Like any service, Houston’s trash providers come with trade-offs:
Pros:
Wide range of providers and price options.
Eco-friendly disposal methods are growing.
Technology makes scheduling and tracking easier.
Cons:
Cheaper providers sometimes delay pickups.
City bulk pickup schedules can be inflexible.
Hidden fees may surprise customers.
Expert Tips for Choosing the Best Trash Houston Service
Compare plans — Look at monthly costs, included recycling, and pickup frequency.
Check reviews — Customer experiences highlight reliability and hidden issues.
Ask about sustainability — Eco-friendly services may align better with your values.
Know your waste volume — Larger households might need bigger bins or more frequent pickups.
Confirm hidden fees — Always ask about fuel surcharges, bulky item charges, or missed pickup fees.
Real-Life Example: A Houston Family’s Experience
One family in The Heights shared their struggle: after months of missed pickups, they switched from a budget service to a mid-range provider. They paid $10 more per month, but their trash and recycling were finally collected on time. For them, peace of mind outweighed saving a few dollars.
FAQ’s
What is the most reliable trash service in Houston?
Top-rated companies like Waste Management and Junk King often score highest for reliability, but local eco-friendly providers also excel.
How much does trash removal cost in Houston?
Residential trash pickup usually ranges from $25–$50 per month. Junk removal and hauling services cost $75–$200 per job, depending on load size.
Does Houston offer free bulk trash pickup?
Yes, the City of Houston schedules free bulk trash collection monthly, but private providers can handle off-schedule pickups for a fee.
What are the most eco-friendly trash services in Houston?
Companies like Local EcoHaul and Junk King focus on recycling and donations, ensuring minimal andfill impact.
Final Thoughts
Choosing the best trash Houston service in 2025 comes down to matching your lifestyle, budget, and values with the right provider. Whether you want affordability, sustainability, or simply reliable weekly pickup, there’s a service tailored to your needs.

In life, pain and uncertainty are inevitable. Whether it’s illness, emotional wounds, or even spiritual dryness, we all face moments where medicine, positive thinking, or practical efforts just don’t feel like enough. That’s when many reach for something deeper—prayer for healing. Across cultures and traditions, prayer has been a vital tool for those seeking physical relief, emotional peace, and spiritual renewal.
But let’s be honest: people often wonder, Does prayer for healing really work? Or is it just a comforting ritual? This long-form guide dives deep—through history, faith traditions, psychological findings, and real-life examples—to explore why prayers for healing continue to matter in 2025 more than ever before.
Why We Seek Prayer for Healing
Humans crave meaning in suffering. Facing illness or heartbreak, many don’t just want treatment; they want hope and inner strength. Prayers for healing provide three key things:
- Comfort in chaos – A reminder that we’re not carrying our pain alone.
- A sense of control – Even when medicine runs out of options, prayer empowers us to take spiritual action.
- Community support – Shared prayers can unite families, friends, and ministries around a single healing intention.
Someone once shared online: “When I was at my lowest, my grandmother’s prayer for healing meant more than the doctor’s words. It gave me the strength to keep going.”
The Power of Healing Scriptures
In many religious traditions, turning to healing scriptures provides spiritual guidance. Believers often meditate on verses that promise relief, hope, or divine strength. For example, passages about resilience, encouragement, or God’s compassion become anchors in tough times.
Scripture serves two purposes:
- Faith Activation – Repetition reinforces trust and hope.
- Mental Peace – Comforting words quiet anxiety and bring rest.
Modern research in 2025 even shows that ritual reading of texts, affirmations, or prayer-like practices lowers stress hormones, supporting the body’s resilience.
Different Types of Prayers for Healing
Not all prayers for healing look the same. Here are some categories people use around the world:
1. Physical Healing
Asking for recovery from sickness, surgery, or chronic conditions. This is the most familiar form.
2. Emotional Healing
Addressing trauma, grief, or mental health challenges. Healing here means peace, not always cure.
3. Spiritual Healing
Seeking a renewed sense of purpose, forgiveness, or connection with God or a higher power.
4. Intercessory Healing Prayer
When one person prays on behalf of another—like families supporting a sick member.
5. Group or Community Prayer
Collective energy can be profound. In churches, mosques, synagogues, and even Zoom prayer groups, people unite for strength.
Does Prayer for Healing Really Work?
This is the million-dollar question. Studies on prayer are notoriously challenging, because how do you measure faith or its impact?
However, science does highlight some fascinating aspects:
- Placebo Effect: Believing in healing can trigger real improvements in pain perception and recovery.
- Stress Relief: Prayer reduces fight-or-flight responses, lowering blood pressure and boosting the immune system.
- Social Bonding: Being prayed for feels supportive, reducing feelings of loneliness and despair.
That doesn’t mean prayer replaces medicine—it complements it. A grounded approach is: Take your medication, follow the doctor’s plan, and pray for healing as part of holistic well-being.
A Real-Life Story of Healing
Consider the story of a professional who was battling burnout and anxiety. Traditional therapy helped but didn’t fully soothe her distress. She began practicing nightly meditation combined with her grandmother’s prayer for healing rituals. Slowly, her sleep improved, stress lessened, and she regained balance.
She described it this way: “I can’t prove prayer alone healed me, but I know I wouldn’t have survived without it.”
This kind of testimony resonates globally because healing isn’t always about a miracle—it’s about regaining strength to keep living fully.
Healing Scriptures That Bring Hope
Throughout centuries, millions have leaned on healing scriptures to inspire courage. These sacred texts are cited in bedside whispers, hospital rooms, and meditation circles. They often highlight themes like:
- God’s promise of renewal
- Strength in weakness
- Light in dark valleys
- Hope for restoration
Even for those not traditionally religious, reading inspiring wisdom passages fosters resilience, hope, and peace of mind.
The Modern Use of Prayers for Healing
In 2025, “prayer” doesn’t always look like folded hands in a pew. It might appear as:
- Mindfulness Prayers: Blending meditation and prayer language.
- Digital Prayer Circles: WhatsApp or Facebook groups uniting for an intention.
- Healing Journeys: Combining yoga, affirmations, and prayer.
- Holistic Medicine Integration: Doctors recognizing spiritual care as part of recovery.
This flexibility ensures prayer for healing stays alive in contemporary culture—it adapts to people’s needs without losing its essence.
The Dual Nature of Healing Prayer
Prayer has two dimensions:
- Petitionary Prayer – Asking God or a Higher Power to intervene.
- Transformative Prayer – Seeking strength to endure difficulty with grace.
Even when physical healing doesn’t happen, transformative prayer provides endurance, peace, and resilience.
Challenges and Misconceptions
- “If it doesn’t work, does that mean my faith is weak?” Absolutely not. Healing can manifest in unexpected ways—sometimes peace matters more than cure.
- “Can prayer replace medical treatment?” No. Responsible spiritual practice works alongside professional care.
- “Is prayer only for believers?” No. “Prayer” can be adapted as focused intention, meditation, or energy alignment across spiritual paths.
FAQs
1. What is a good short prayer for healing?
A good prayer is honest and heartfelt, such as asking for strength, peace, and restoration—spoken in your own words.
2. Can prayer actually heal physical illness?
Prayer may not directly cure disease, but it can reduce stress, improve outlook, and complement medical care, supporting overall healing.
3. What healing scriptures are often used in prayer?
Passages that emphasize strength, renewal, and hope are most frequently chosen during illness or hardship.
4. Is there a difference between prayers for healing and affirmations?
Yes, affirmations are self-directed statements, while prayers for healing are directed toward God or a higher power. Both can coexist.
Final Thoughts
At its heart, prayer for healing isn’t about magical words—it’s about intention, hope, and connection. In 2025, amidst constant stress and global challenges, people are rediscovering the power of pausing, centering themselves, and speaking words of faith.
Whether through ancient healing scriptures, whispered prayers for healing, or modern meditation practices, the goal remains the same: to find restoration of body, mind, and soul.
-

 GENERAL8 months ago
Classroom6x: Revolutionizing the Future of Learning
-

 ENTERTAINMENT8 months ago
Unveiling the Mystery of Kashito_Toto: A Digital Frontier
-

 TECHNOLOGY8 months ago
Unlocking the Power of SSIS 816: A New Era in Data Integration
-

 TECHNOLOGY8 months ago
Unlocking the Mystery of Vy6ys: A Hidden Gem
-

 GENERAL8 months ago
Unraveling Time: What Hour Was It 8 Hours Ago?
-

 GENERAL8 months ago
Quid Pro Quo Harassment: What It Is and Why It Matters
-

 BUSNIESS8 months ago
What Does ‘In Transit’ Mean? Understanding Shipment Status
-

 BUSNIESS8 months ago
Understanding Sell in Trade Locker: A Key to Smart Trading