Proper drainage installation is essential for safeguarding your property against costly water damage and maintaining a stable foundation. Without a reliable system, excess water can lead to erosion, basement flooding, or landscape deterioration. Whether you’re a homeowner tackling a DIY project or a professional searching for best practices, understanding the right approach makes all the difference. For specialized local expertise, consider consulting professionals in drainage installation MA, who bring valuable regional experience to residential and commercial installations. This guide provides a thorough overview, including types of drainage systems, step-by-step installation, common pitfalls, and practical maintenance tips to ensure your investment stands the test of time.
Planning and Preparation
Success starts with a clear plan tailored to your property’s unique landscape. Begin by assessing your site during and after rainfall to locate trouble spots—areas with persistent puddles, basement leaks, or visibly eroded soil. Analyze the topography: Is your land flat, sloped, or dotted with natural low points? Understanding how water naturally moves across your property helps you map where intervention is most needed.
Soil composition plays a major role in drainage efficacy. Sandy soils ensure faster water movement, while clay-heavy areas have poor absorption and a tendency to retain water. Adjust your drainage design according to your findings, considering the proximity of structures, landscaping, and property boundaries.
Choosing the Right Drainage System
Popular Drainage Options
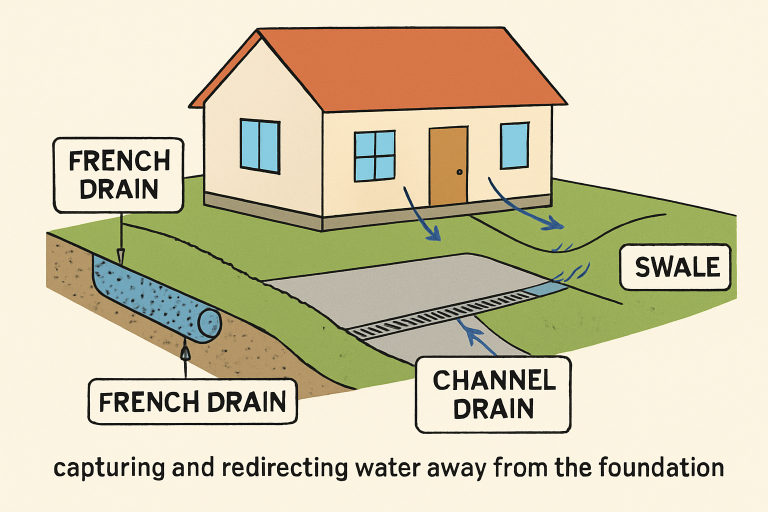
- French Drains: These subsurface systems use perforated piping encased in gravel, which is ideal for redirecting groundwater away from homes and landscaping features susceptible to saturation.
- Channel Drains: Surface-level solutions designed to intercept and route runoff from driveways, patios, or pool decks. Channel drains are especially effective in paved areas that collect rainwater quickly.
- Swales: Shallow, grass-lined ditches or depressions shaped to encourage the slow movement of water across lawns or gardens, protecting against large-scale flooding and promoting groundwater recharge.
Selection depends on site conditions and your drainage goals. For example, if you routinely deal with surface water, a combination of swales and channel drains may be effective, while properties with persistent groundwater issues often benefit from French drains. Additionally, always factor in your regional climate; frequent heavy rains may require more robust drainage capacity.
Materials and Tools Required
Preparation saves time and ensures your installation runs smoothly. Commonly used materials include:
- Drainage pipes: Choices like perforated PVC or corrugated plastic provide durability and flexibility to suit various layouts.
- Gravel: Used for pipe bedding and increased drainage efficiency.
- Filter fabric: Prevents soil from entering and clogging the pipe, maintaining system performance.
- Concrete: Occasionally needed for anchoring or creating catch basins, especially in channel drain systems.
Key tools include a sturdy shovel, level, hand saw for pipe adjustments, wheelbarrow for hauling, and essential safety gear like gloves and eye protection. A trenching tool or mini-excavator may be helpful for larger projects.
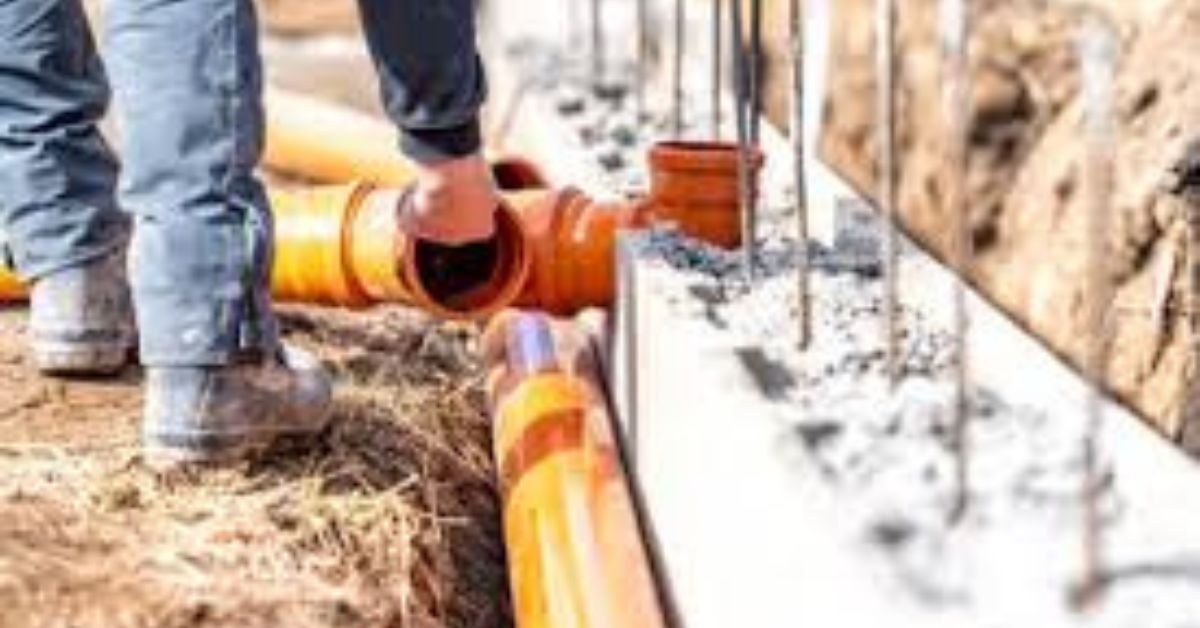
Step-by-Step Installation Guide
- Excavation: Using your predetermined routing, dig a trench along the drainage path, maintaining a slope of at least 1% (minimum 1 inch drop per 8 feet) to guarantee consistent water movement away from problem areas.
- Foundation Preparation: Spread a 2–3 inch base layer of gravel in the trench. This layer cushions the pipe and helps discourage soil movement beneath it.
- Pipe Installation: Lay the drainage pipe on top of the gravel, verifying the slope with a level. Position pipe holes (if using perforated pipe) facing downward or to the side.
- Covering the Pipe: Pour additional gravel around and above the pipe until it is covered by at least 2–3 inches. Wrap the entire gravel layer in filter fabric to stop soil intrusion and eventual clogging.
- Backfilling: Fill the remaining trench with topsoil, compacting gently as you go. Avoid heavy packing, as excessive compaction can damage pipes or disrupt the drainage gradient.
Common Mistakes to Avoid
- Insufficient Slope: Even a minimal slope is critical for allowing water to flow out of the system. Flat trenches can result in pooling and undermine the entire project.
- Poor Maintenance: Over time, leaves, roots, and debris can block pipes and inlets. Neglecting regular clearing can cause backups, leading to unexpected flooding.
- Ignoring Soil Composition: Installing a one-size-fits-all system can be a costly mistake. For instance, heavy clay soils might necessitate larger or more frequent outlets and broader gravel beds.
Maintenance and Inspection
Sustaining Peak Performance
- Debris Removal: Check inlets, gutters, and outlet points frequently, especially after storms, to ensure obstructions do not inhibit water flow.
- Inspection: Walk your system at least twice a year and after significant rainfall. Look for signs of slow drainage, water backing up, or soft spots on the surface.
- Professional Assessment: For complex or older systems, an annual review by a drainage professional can identify early-stage problems—such as root intrusions, crushed pipes, or system undermining—before they become expensive repairs.
Reliable drainage preserves both foundational integrity and the aesthetic appeal of your landscaping. By investing in careful planning, smart system selection, and ongoing upkeep, you can avoid water problems and boost your property’s value for years to come.