Connect with us

GENERAL

Master Your Skills: Free CNA Practice Test for Success

Published

on

Practice CNA test free

Master Your Skills: Free CNA Practice Test for Success

Practice CNA test free becoming a Certified Nursing Assistant (CNA) is a rewarding career choice that provides a vital service to individuals in need of care. However, before you can embark on this fulfilling career path, you must first pass the CNA exam. This is where free CNA practice tests come into play. Taking these practice tests is one of the most effective ways to ensure you’re well-prepared for the real exam. In this article, we will explore the importance of CNA practice tests, how they can help you master your skills, and why they are an essential part of your study routine.

What is a CNA Practice Test?

Practice CNA test free is a tool designed to simulate the actual CNA exam. It consists of questions that are similar in format and difficulty to the questions you will encounter during the official exam. These tests typically cover a wide range of topics, including patient care, infection control, anatomy, and communication. Practice tests can be taken online for free or in some cases, purchased as part of study packages.

The purpose of these practice tests is to familiarize you with the exam format, help you assess your knowledge, and identify areas where you need more study. By taking practice tests, you can build confidence and improve your chances of passing the CNA exam on your first attempt.

Why Are Free CNA Practice Tests Important?

Practice CNA test free offer numerous benefits to aspiring nursing assistants. They provide a cost-effective way to prepare for the CNA exam and are available online, making them easily accessible for everyone. Let’s explore some key reasons why practicing with free CNA tests is crucial:

1. Understanding the Exam Format

The CNA exam consists of two main components: a written (or oral) test and a clinical skills test. The written test includes multiple-choice questions that assess your knowledge of nursing procedures, patient care, and ethical considerations. The clinical skills test requires you to demonstrate various hands-on nursing tasks, such as taking vital signs and assisting patients with basic needs.

Taking practice CNA test free helps you familiarize yourself with both the written test format and the clinical skills requirements. By practicing with similar questions, you can ensure that you are comfortable with the structure and timing of the exam, leading to a less stressful experience on test day.

2. Building Confidence

One of the most significant benefits of practicing with CNA tests is the confidence you will gain. It’s normal to feel nervous about an important exam, but by repeatedly practicing and improving your skills, you will feel more confident in your ability to pass. As you track your progress and see improvements in your scores, your self-assurance will grow, helping you stay calm and focused during the actual exam.

3. Identifying Knowledge Gaps

CNA practice tests are an excellent way to identify areas where you might be lacking knowledge or understanding. As you take practice exams, you’ll encounter questions on a variety of topics. If you find that you’re struggling with a particular subject or topic, you’ll know where to focus your studies. Whether it’s infection control or patient rights, identifying these gaps early will give you time to revisit the material and improve your understanding.

4. Mastering Time Management

The CNA exam is time-sensitive, and managing your time effectively is crucial to completing the test within the allotted time. Practice tests help you develop the pacing skills you need to ensure that you’re answering questions efficiently. By practicing under timed conditions, you will learn how to prioritize questions, avoid getting stuck on difficult ones, and pace yourself for optimal performance.

5. Simulating Real Test Conditions

Taking free CNA practice tests helps you simulate the real test environment. This experience is invaluable because it allows you to practice answering questions under pressure, just like you will during the actual exam. This level of preparedness ensures that you are not caught off guard on test day, which can help you remain calm and focused.

Where to Find Free CNA Practice Tests

There are numerous websites and platforms that offer free CNA practice tests, but it’s essential to find reliable and high-quality resources. Here are some of the best places to find free CNA practice tests:

1. State Nursing Boards

Some state nursing boards offer free CNA practice tests to help candidates prepare for the exam. These tests are designed to reflect the specific requirements and standards set by the state, so they can provide an accurate representation of what to expect.

2. Online Education Websites

Several online education platforms provide free CNA practice tests as part of their study materials. Websites like Nurse Plus Academy, ProProfs, and CNA Plus offer a range of practice tests, study guides, and other helpful resources. These websites often allow you to track your progress and compare your results to other candidates.

3. CNA Test Prep Apps

There are also mobile apps available that offer CNA practice tests. Apps like CNA Exam Prep and Nursing Assistant Exam Prep provide free practice questions that you can take on the go. Using an app can be a convenient way to study during short breaks or when you have some free time between other responsibilities.

4. YouTube and Video Tutorials

Some YouTube channels and video tutorials provide practice questions and explanations for CNA exams. These videos can be useful for reviewing concepts and ensuring that you’re studying the right material. While not all of these resources offer full practice tests, they can supplement your preparation by providing visual explanations of critical topics.

How to Make the Most of Your Free CNA Practice Tests

Simply taking practice tests is not enough—how you approach these tests can make a significant difference in your preparation. Here are some tips for getting the most out of your practice exams:

1. Set a Study Schedule

To maximize your practice test experience, it’s important to set a study schedule. Rather than cramming all of your study time into one day, spread your practice tests over several weeks. This will help you retain more information and avoid feeling overwhelmed. Dedicate specific days or times to practice, and stick to the schedule.

2. Review Incorrect Answers

After completing a practice test, take the time to review your answers, especially the ones you got wrong. Understand why you made the mistakes and revisit the material that caused you difficulty. This targeted approach will help you reinforce the concepts and improve your understanding.

3. Practice Consistently

Consistency is key when it comes to mastering the CNA exam. Taking multiple practice tests over a period of time will help you improve your scores and enhance your overall knowledge. Consistent practice also helps you become more familiar with the exam format and timing, allowing you to approach the actual exam with confidence.

4. Simulate Real Testing Conditions

When taking a practice test, try to simulate the actual testing environment as much as possible. Set aside a quiet, distraction-free space, and time yourself to complete the test within the allotted time. Treat it like the real exam, so you can adjust to the pressure and develop good time-management habits.

5. Track Your Progress

Many online practice test platforms offer tracking tools that allow you to monitor your progress over time. Use these tools to see how your scores improve and where you still need to focus your attention. Tracking your progress will give you valuable insight into your strengths and weaknesses.

Final Thoughts: Preparing for Success

Mastering your CNA exam skills with free practice tests is an essential part of your study plan. Not only will these tests familiarize you with the exam format, but they will also help you identify knowledge gaps, build confidence, and improve your time-management skills. With consistent practice, you’ll be well-equipped to tackle the CNA exam and start your career as a Certified Nursing Assistant.

The key is to start early, stay consistent, and take full advantage of the free practice tests available. Whether you choose to use online resources, apps, or other platforms, these tools are designed to help you succeed. By putting in the effort now, you’ll be able to confidently walk into the exam room and take the next step toward a fulfilling career in healthcare.

Continue Reading
Click to comment

Leave a Reply

Your email address will not be published. Required fields are marked *

GENERAL

For Your Happy Tears

Published

on

By

For Your Happy Tears

For Your Happy Tears

When you hold a delicately embroidered handkerchief that reads “For Your Happy Tears,” it evokes an intimate blend of emotion, tradition, and thoughtful personalization. This heartfelt keepsake—a wedding handkerchief—carries deep symbolism, connecting the bride, groom, and their families through tears of joy, family heirlooms, and sentimental ceremony accessories.

The Symbolism Behind Wedding Handkerchiefs

From the moment the bride walks down the aisle, the sight of these beautifully crafted keepsake hankies becomes more than an accessory—it’s a statement of love. These personalized wedding hankies often feature intricate embroidery, monograms, and sometimes lace trim. Each detail signals care and intention, making them a standout accessory carried by bridesmaids, groomsmen, and parents alike.

Wedding handkerchiefs have been cherished across generations, passed from mother of the bride to bride, then to future generations as a family heirloom. They align perfectly with the tradition of “something old, something new,” helping weave continuity into modern celebrations.

Choosing the Perfect Fabric: Cotton, Linen, or Silk

Selecting the right fabric for your wedding handkerchief matters, both in look and longevity. Cotton and linen options provide a classic texture that feels both soft and breathable, ideal for guests who may experience emotional moments. Lace-trimmed versions add an air of delicate elegance, while luxurious silk varieties ensure a keepsake that stands the test of time. Whichever fabric you choose, a well-chosen handkerchief becomes more than a tissue—it becomes a keepsake.

Embroidery & Personalization: The Heart of the Hankie

Personalization turns a simple cloth into a story. Some couples opt for elegant monograms of their initials, framed by floral motifs or the wedding date. Others choose heartfelt quotes like “Tears of Joy” or “Thank you for sharing our special day.” The phrase “For Your Happy Tears” strikes that perfect balance—evocative, warm, and subtly guiding recipients on how to use it during the ceremony.

Beyond words, details like embroidery color matching the wedding palette or tiny symbols—like intertwined rings, hearts, or even the couple’s cultural emblem—add layers of meaning. Bridesmaids clutch these handkerchiefs as they walk down the aisle; grooms often tuck one into their jacket pocket, ready for the celebratory first look.

Who Receives a Handkerchief & When You’ll Use It

Handkerchiefs labeled “For Your Happy Tears” are versatile gifts. Typically, the bride and groom present them to those most likely to shed happy tears: mothers, fathers, grandparents, and bridal party members. These are carried during key moments—exchange of vows, first kiss, speeches, father‑daughter dance, last toast of the night.

At the reception, some couples place personalized hankies at guest place settings, inviting everyone to share in the sentiment. Whether gently dabbed against eyes during emotional speeches or tucked into suit pockets as a personal memento, these cloths serve a purpose beyond decoration—they bridge emotional moments.

DIY vs. Professional Customization

Couples often debate between DIY and professional options. If crafting from home, beginner-friendly kits are available with linen squares, embroidery floss, and pattern guides. This route can be deeply meaningful—perhaps involving childhood friends crafting them together or mothers embroidering for their children.

But professional services bring polish and consistency. Online vendors offer laser-cut lace, digitized embroidery in precise fonts, and options to preview your design digitally before ordering. These services offer fast delivery, color accuracy, and the ability to buy in bulk for bridal parties and family members, ensuring every cloth aligns with the wedding aesthetic.

Preserving Your Keepsake Post‑Wedding

Once the confetti settles and the dance floor clears, preserving your personalized handkerchiefs becomes a priority. Begin with gentle hand‑washing in cool water and mild detergent. Lay flat to dry, avoiding bleach or harsh chemicals. If needed, press lightly with a cool iron.

To keep the sentiment alive, consider framing a handkerchief along with a photo from the ceremony or including them in a scrapbook. Passing down these heirloom tissue cloths to future generations adds a layer of storytelling—who used it, at which moment, and how it connected hearts. These pieces become tangible fragments of love that last lifetimes.

Integrating Hankies into the Wedding Day

Synergy is key when weaving “For Your Happy Tears” into your wedding theme. Here’s how couples often incorporate them:

  • Bouquet Accent: Tie a handkerchief around the bridal bouquet as a soft, flowing accent.

  • Ceremony Programs: Roll each program with a coordinating hankie and ribbon for cohesion.

  • Reception Table Settings: Place cloths as part of table decor, over napkins or in wicker baskets at each place.

  • Bridal Party Gift Bags: Including a personalized hanky alongside other wedding party gifts (e.g., robe, jewelry, candles) is always appreciated.

By integrating the handkerchief into decor and gifting, you elevate a simple cloth into a storytelling device steeped in emotion and aesthetics.

Key Term Table

Term Usage in Article
Personalized wedding hankies Used when talking about customization and embroidery
Wedding keepsake Applied to emotional value and heirloom potential
Embroidery Discussed in design and personalization section
Monogrammed handkerchiefs Used for detailing initials and decorative styles
Lace trim Included when exploring fabric selections
Family heirloom Emphasized in narrative about generational passing
Ceremony accessories Mentioned when describing how hankies are used during the ceremony
Bridal party favors Referenced in section about gifting to bridesmaids and groomsmen
Heirloom tissue cloth Used in preservation and sentimental sections
DIY embroidery kits Discussed under DIY vs professional customization

FAQs

1. What does “For Your Happy Tears” mean on a wedding handkerchief?
It’s a gentle nudge—a reminder that shedding tears of joy is welcome and celebrated. It transforms a tissue into a meaningful keepsake.

2. How do I choose the best fabric for a lasting wedding handkerchief?
Opt for natural fibers like cotton or linen for softness and breathability, silk for luxury and sheen, or add lace trim for elegance—each resists fading and hold sentimental value.

3. Can I embroider a personalized message on a wedding hanky at home?
Absolutely! DIY embroidery kits make it accessible to beginners. The process adds a personal, handcrafted sentiment that recipients will cherish.

4. Who typically receives a personalized wedding handkerchief?
Common recipients include the bride, groom, parents, grandparents, and bridal party members—anyone likely to experience emotional moments.

5. How do I preserve these keepsakes after the wedding?
Hand-wash gently in cool water, lay flat to dry, lightly iron if needed, and store in acid-free tissue or frame with a photo for display. These become treasure items for years to come.

Conclusion

The phrase “For Your Happy Tears” isn’t just a slogan—it’s a sentiment wrapped in tradition, art, and emotional depth. A personalized wedding handkerchief becomes a beacon of love at the moment when hearts overflow, a sentimental wedding accessory that bridges eras and generations, and a bespoke bridal party favor that touches every guest.

These beautifully crafted keepsakes—whether monogrammed, lace-trimmed, family heirlooms, or DIY treasures—hold the laughter and tears of your wedding day in soft folds. They’re gentle reminders that emotion is powerful, that every tear matters, and that love lives on in the smallest, most meaningful READ MORE

Continue Reading

GENERAL

Capture Every Moment: Top Picks for the Best Vlogging Camera

Published

on

By

Capture Every Moment

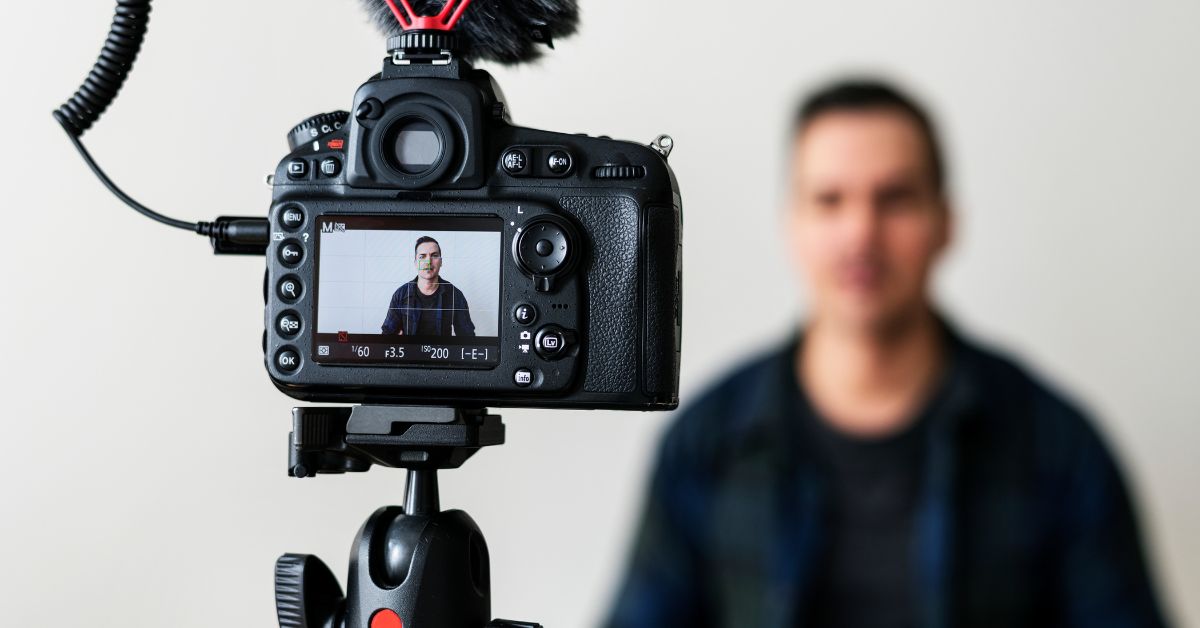
capture-every-moment best vlogging camera is essential for capturing high-quality videos that engage audiences. Whether you’re a beginner starting your YouTube channel or a seasoned creator seeking to upgrade your gear, the right camera can dramatically enhance your storytelling capabilities. With a myriad of options ranging from compact mirrorless cameras to versatile action cams, understanding the features that matter—such as video resolution, image stabilization, autofocus, and audio input—is crucial to finding a device that suits your unique vlogging style.

Why Choosing the Right Vlogging Camera Matters

Vlogging demands a camera that balances portability with performance. Unlike traditional photography, video content requires continuous autofocus, smooth stabilization, and clear audio capture to produce professional-grade footage. The best vlogging cameras incorporate cutting-edge sensor technology and user-friendly interfaces that allow creators to focus on content rather than technical hassles.

A camera with high 4K resolution ensures crisp, vibrant visuals, while effective image stabilization minimizes shaky footage, especially during on-the-go shooting. Additionally, features like flip-out screens empower vloggers to frame themselves accurately during selfies or live recordings. The integration of external microphone inputs further improves sound quality, which is a critical yet often overlooked aspect of engaging videos.

Close up influencer holding flowers

Key Features to Consider in a Vlogging Camera

When searching for the ideal vlogging camera, several technical specifications should guide your decision.

Video Resolution and Frame Rate

High-definition video, such as 1080p Full HD and 4K Ultra HD, delivers sharp images that captivate viewers. Some cameras offer slow-motion capabilities by shooting at higher frame rates like 60fps or even 120fps, allowing creators to add creative flair to their videos.

Image Stabilization

Optical Image Stabilization (OIS) and In-Body Image Stabilization (IBIS) technologies reduce camera shake and produce smooth footage, especially important for handheld shooting. This feature enhances viewer experience by providing steady, professional-looking videos.

Autofocus Performance

Fast and accurate autofocus systems, often utilizing phase detection or contrast detection, ensure your subject remains sharp throughout dynamic scenes. Eye-tracking autofocus is a game-changer for vloggers who want to maintain focus while moving or interacting with their environment.

Audio Input Options

Built-in microphones are convenient but typically fall short in sound quality. Cameras equipped with external microphone jacks or compatibility with wireless mics offer superior audio capture, essential for clear narration and dialogue.

Top Vlogging Cameras to Consider in 2025

Sony ZV-1: Compact Powerhouse for Content Creators

Sony’s ZV-1 has quickly become a favorite among vloggers for its blend of compact design and professional features. This camera boasts a 20.1-megapixel sensor, advanced real-time eye autofocus, and excellent 4K video recording capabilities. Its vari-angle LCD screen allows for easy framing during selfie shooting, while the built-in directional microphone delivers enhanced audio quality.

The ZV-1 also features background defocus settings, perfect for achieving that cinematic blurred background effect, a popular aesthetic among YouTube creators. Its lightweight form factor makes it ideal for travel and everyday vlogging.

Canon EOS M50 Mark II: Versatile Mirrorless with Superior Autofocus

For those who prefer mirrorless cameras, the Canon EOS M50 Mark II offers a compelling combination of versatility and ease of use. Equipped with a 24.1-megapixel APS-C sensor, it provides vibrant images and sharp 4K video, although with some crop in the video frame.

The Dual Pixel CMOS autofocus system ensures smooth and reliable focus tracking, while the fully articulating touchscreen helps vloggers maintain perfect framing. Additional features like clean HDMI output make this camera suitable for live streaming and content creation on multiple platforms.

GoPro HERO11 Black: Rugged Action Camera for Adventure Vloggers

For outdoor enthusiasts and adventure vloggers, the GoPro HERO11 Black delivers unparalleled durability and high-resolution capture. This action camera shoots stunning 5.3K video and includes HyperSmooth stabilization, ensuring ultra-smooth footage even in the most extreme conditions.

Its waterproof design and compact size allow vloggers to film underwater scenes or mount the camera on helmets, bikes, and drones. The HERO11 also supports voice commands, making it easy to operate hands-free during active shoots.

Accessory Essentials to Complement Your Vlogging Camera

Beyond the camera body, several accessories enhance your vlogging setup. External microphones, such as shotgun or lavalier mics, drastically improve audio clarity. Portable LED lights help maintain consistent lighting in low-light environments, while tripods and handheld gimbals offer stability and creative shooting angles.

Battery life is another consideration; carrying extra batteries or using portable chargers ensures uninterrupted filming sessions. Memory cards with high write speeds accommodate large 4K files without lag.

Tips for Maximizing Your Vlogging Camera’s Potential

Creating captivating videos isn’t just about hardware—it’s also about technique. Utilize manual settings like aperture, shutter speed, and ISO to control exposure and depth of field for more cinematic shots. Experiment with different shooting angles and natural lighting to add visual interest.

Additionally, leveraging post-production software to color grade and edit footage can enhance the storytelling impact. Finally, consistent practice and reviewing your recordings will help you master your equipment and develop your unique vlogging style.

Full shot blurry woman with camera

Frequently Asked Questions (FAQs)

Q: What is the best budget-friendly vlogging camera for beginners?
A: Cameras like the Canon EOS M50 Mark II and Sony ZV-1 offer excellent entry-level options with user-friendly features and quality performance.

Q: Do I need a 4K camera for vlogging?
A: While 4K provides higher resolution and future-proofs content, 1080p Full HD cameras can still produce excellent videos and are often more affordable.

Q: How important is image stabilization in a vlogging camera?
A: Very important, especially if you film handheld or on the move. Stabilization reduces shaky footage, making videos more professional and enjoyable to watch.

Q: Can I use my smartphone as a vlogging camera instead?
A: Smartphones can be great for casual vlogging, but dedicated cameras offer better optics, stabilization, and audio options.

Q: What accessories should I get with my vlogging camera?
A: Essential accessories include an external microphone, tripod or gimbal, extra batteries, and memory cards with fast write speeds.

Conclusion

Choosing the best vlogging camera involves balancing factors like image quality, portability, autofocus speed, and audio capabilities. Whether you opt for the compact yet powerful Sony ZV-1, the versatile Canon EOS M50 Mark II, or the rugged GoPro HERO11 Black, investing in a camera that aligns with your content style will elevate your videos and help you capture every moment;s with clarity and creativity. Complement your camera with the right accessories and techniques, and you’ll be well on your way to creating compelling vlogs that resonate with your audience.

CLICK HERE FOR MORE BLOG POSTS 

Continue Reading

GENERAL

Fresh Floors: The Magic of Baking Soda on Carpets

Published

on

By

Fresh Floors

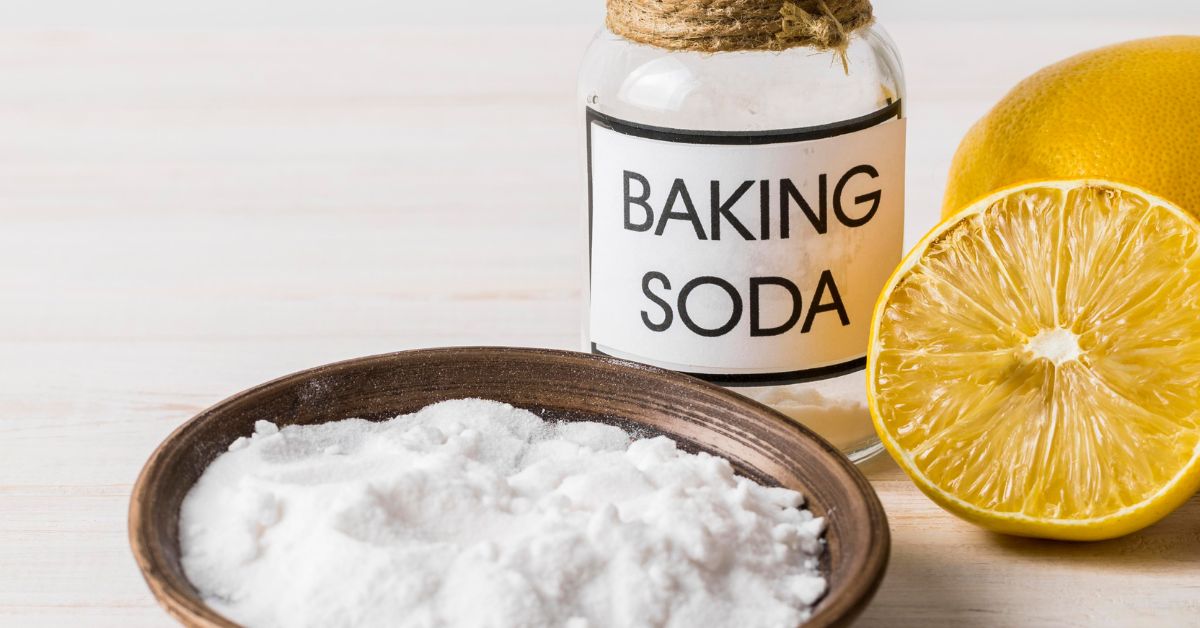
Fresh Floors Sprinkling baking soda on your carpet can seem like a simple trick—but the results are nothing short of transformational. This household staple isn’t just for baking; it’s a natural deodorizer and gentle cleaner that tackles deep odors, brightens fibers, and leaves your space feeling fresh. With no harsh chemicals involved, it’s a safe, eco-friendly way to maintain a clean home environment.

Why Baking Soda is Effective on Carpets Fresh Floors

Neutralizes Odors at the Source Fresh Floors

Baking soda, or sodium bicarbonate, is known for its ability to absorb and neutralize acidic and basic odor molecules. Unlike air fresheners that mask smells, baking soda tackles them chemically, making it an ideal option for homes with pets, kids, or smoke.

Absorbs Moisture and Residue

Its fine, dry texture allows it to soak up excess moisture, trap particles from spills, and help dry out stains like coffeeBroken soap bar on white board near brush on black surfaceor juice. It’s especially helpful for preventing mold or mildew on damp carpet areas.

How to Prepare Your Carpet Before Using Baking Soda

Vacuum Thoroughly First

Always start by removing loose debris and dust. This ensures the powder penetrates deeper into the carpet fibers.

Identify Problem Zones

High-traffic areas, pet zones, and near-entry spots often hold the most odors. Focus your attention there for better results.

Perform a Spot Test

While baking soda is generally safe, always test on a small corner to make sure your carpet doesn’t react, especially if it’s made of delicate fibers like wool.

Application Methods That Work Best

Basic Deodorizing Method

Sprinkle a light layer of baking soda over the carpet. Let it sit for 30 minutes to several hours, then vacuum thoroughly. This is great for general freshening.

Add Essential Oils for Extra Scent

Mix a few drops of lavender, lemon, or eucalyptus essential oil with the baking soda. Let it dry, then sprinkle and vacuum as usual. It leaves a pleasant fragrance behind.

Treating Specific Stains

For spills or stains, slightly dampen the area, sprinkle baking soda, and let it dry completely. Then scrub gently with a brush and vacuum up the residue.

Combining Baking Soda with Other Natural Cleaners

Baking Soda and Vinegar

Spray a 1:1 solution of white vinegar and water on the stain. Once it stops fizzing, sprinkle baking soda. Let it dry completely and vacuum the area. This method is effective for deep cleaning and lifting stubborn grime.

Club Soda and Baking Soda for Fresh Stains

Pour a bit of club soda onto a fresh spill, then sprinkle baking soda. The carbonation helps lift the stain while the powder absorbs moisture and odor.

Ongoing Maintenance Tips

Use Regularly

Sprinkle baking soda weekly or biweekly in high-use areas to keep odors under control and carpets looking vibrant.

Use Rugs and Mats Strategically Fresh Floors

Placing rugs in high-traffic areas reduces wear and traps dirt. These can be cleaned separately using baking soda as well.

More Than Just Freshness: Added Benefits

  • Safe for Pets and Kids: Baking soda doesn’t release harmful fumes or leave residues.

  • Affordable: It’s far cheaper than most commercial carpet cleaners or deodorizers.

  • Allergy-Friendly: Ideal for people with asthma or chemical sensitivities.

  • Multi-Use: Besides carpets, it can be used on upholstery, mattresses, and even in shoes.

Common Challenges and How to Handle Them

Persistent Pet Odors

Use an enzyme cleaner first, then baking soda to deodorize after the stain is broken down. This two-step process works better than using baking soda alone.

Grease or Oil Stains

First, apply cornstarch or baby powder to absorb the oil. Vacuum and follow with baking soda to lift any remaining residue.

Smoke and Cooking Smells Fresh Floors

Mix baking soda with a small amount of activated charcoal for stronger deodorizing power in areas with strong smoke or food smells.

Safety Guidelines for Best Results

  • Don’t Oversaturate the Area: Avoid using too much water when pre-treating to prevent mildew.

  • Vacuum Properly: Use a vacuum with good suction to remove all baking soda from deep fibers.

  • Keep Pets Away During Treatment: Although safe, you should keep pets out of the room during application to avoid inhalation or paw contact.

When to Call the Professionals Fresh Floors

While baking soda is powerful, some messes—like years of deep staining or delicate antique rugs—may require professional carpet cleaning services. Steam cleaning or dry-cleaning methods may be more appropriate in those cases.

Young man cleaning carpet with brush indoors

Conclusion

Using baking soda on carpets is one of the most effective, affordable, and natural ways to maintain a fresh-smelling home. From lifting stains to eliminating unpleasant odors, this kitchen staple is a trusted ally in home care. Whether you’re deep-cleaning after a pet accident or just freshening up your living room before guests arrive, baking soda makes it easier—and healthier—to enjoy cleaner carpets.

CLICK HERE FOR MORE BLOG POSTS

Continue Reading

Trending